***** ALERT - Nominations for your new ClubCJ Committee can be made here *****
X Factor Air Dams
Moderators: Moderators, Senior Moderators
-
peternguyen
- Lancer ES/EX

- Posts: 138
- Joined: Sat Feb 12, 2011 7:42 am
- Location: Melbourne, Australia
-
peternguyen
- Lancer ES/EX
- Posts: 138
- Joined: Sat Feb 12, 2011 7:42 am
- Location: Melbourne, Australia
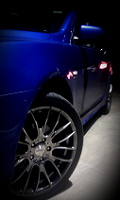
I had just installed my X-Factor Air Dams today, and so I thought I'd share my experience in case it helps anyone...
Marking the holes: I used the 'marker makers' as described in the instructions and it took a few attempts before I was happy with the placement. It was more difficult than I had imagined because the air dam was not shaped exactly to the curve of the bumper, so you would have to bend/flex the air dam around the bumper.
Tip: When sticking the markers on the air dam, I dabbed my fingers on the side that sticks to the air dam so that side would be less sticky and the other side would more easily stick to the bumper.
Drilling: This was scary. After I got over it, I started drilling the pilot holes. The second, bigger holes I drilled, I did not make them oval... at first.
Attaching the air dams: I managed to feed the screws in all the holes; that was a good sign. Screwing the washers on was a bit tricky, but made a lot easier with a 1/4" socket driver that I had got from Bunnings.
Gaps: After screwing in the washers, the air dams were not sitting flush with the bumper. After some troubleshooting, I had found out that the 'screw clips' second from the one near the wheel arch was protruding out a little too much. So I had to sand it down. The other thing was the holes not being oval. I had realized that extending the hole across (in the direction toward the center of the bumper) allowed me to 'stretch' the air dam across toward the center, making it wrap around the curve better.
Overall, these air dams were awkward to install. And a more detailed and informative instruction manual would be nice. But once on, and on nicely, they look great.
Who is online
Users browsing this forum: No registered users and 15 guests